Spatial Music Workshop Event on Friday, August 14

I’m looking forward to attending the Spatial Music Workshop at Virginia Tech’s Institute for Creativity, Arts, and Technology next week. The workshop culminates in an event where we’ll present the works developed during the week. If you’re in the area and are interested, it’s on Friday 8/14 at 7:30pm at the Moss Arts Center Cube. Further info is available at this link and a pdf is available.


StaffTab Tutorial Part 2: Implementing StaffTab Notation in Finale

Please start with StaffTab Tutorial Part 1 for an explanation of  StaffTab™ and instructions on setting up a Finale template. (StaffTab is a trademark of Greg Howard and Emmett Chapman.) Either use the template that you set up from Tutorial Part 1 or download the provided template. In Part 2, we’ll go over how to use Finale to implement the specific markings used in StaffTab notation. This tutorial is specific to Finale 2014 for Mac.

Using the Template

With the provided template, notes should default to the round (first finger) shape. The template is blank. You’ll need to have notes to work with, so use any method to get the notes into your Finale document.

There are three aspects that need to be set for StaffTab: the note shape, the fret number, and the string marker. It doesn’t really matter which order this is done in, as each part is attached to the note itself.


Click to download the
Finale StaffTab template.

Note Shapes

In StaffTab, the note shape denotes which finger should be used to play the note. Note shapes can be set using the Note Shape Tool.

- Select the Special Tools from the Tool palette.

- Select the Note Shape Tool from the Special Tools palette.

- Click in the measure that has the notes to change, the note handles will become visible.
- Select the notes to change. Notes can be selected individually or in multiples by shift-clicking or clicking and dragging. Only notes within the same measure can be selected at once.


An example showing the note handles visible in the first measure of the top staff. The first, fourth, and last notes of the measure are selected.


- Press “Enter” or “Return” to see the "Symbol Selection" dialog. It’s also possible to double-click the note handle to open this dialog.
- Select the desired shape (to represent which finger should play the note).

The Symbol Selection dialog, with the solid diamond shape selected.

- Click “Select” or press enter again to close the dialog. The note shape can also be selected by double-clicking, which will automatically close the dialog.
The selected notes will now have the selected note shape.


The selected notes now have a diamond-shaped note head, noting that these notes should be played with the second finger.


Repeat this process for all the notes that need to be changed.

The specific symbols to use for solid noteheads are as follows:
First finger: 207 = (Option+Q) = solid circle
Second finger: 226 = (Shift+Option+0) = solid diamond
Third finger: 209 = (Shift+Option+-) = solid triangle
Fourth finger: 208 = (Option+-) = solid square

The specific symbols to use for hollow noteheads are as follows:
First finger: 250 = (Option+H) = hollow circle
Second finger: 225 = (Shift+Option+9) = hollow diamond
Third finger: 177 = (Shift+Option+=) = hollow triangle
Fourth finger: 173 = (Option+=) = hollow square


String Markers

The string markers provide a visual reference for which string the note is played on. String markers are added using the Articulation Tool.
- Select the Articulation tool from the main tool palette.


There are a few ways to add a string marker.

Adding an Articulation to an Individual Note
- Double-click on an individual note, this opens the “Articulation Selection” dialog.
- Select the string marker that was setup in the first tutorial. In the provided template, this is in position 63.
- Click “Select” to closed the dialog. The selected note now has a string marker attached to it.

- Use the articulation’s handle to drag it to the correct staff line. Per the settings setup for the template, the string marker will “snap” to the staff lines.

Adding an Articulation to Multiple Notes
- Click and drag across notes to select multiple notes, this opens the “Apply Articulation” dialog.
Clicking “Select” will open the “Articulation Selection” dialog where the string marker can be selected (see instructions above) or simply type in its location (63).
- Click “OK” to close the dialog and apply the string marker to all the selected notes.

- Use each articulation’s handle to drag it to the correct staff line. Per the settings setup for the template, the string markers will “snap” to the staff lines. Multiple articulations can be selected and moved at once.

Adding an Articulation Using a Metatool
The quickest way to apply the string markers is to setup a Metatool.
- Hold “Shift” and press whichever key you’d like to assign to the string marker articulation. The “Articulation Selection” dialog opens. Select the string marker that was setup in the first tutorial. In the provided template, this is in position 63.
- Click “Select” to assign the key to the string marker.

Now that the Metatool is assigned, simply hold that key down while clicking on a single note or while dragging across multiple notes. This will assign the string marker to the selected note(s) without opening any dialogs or requiring any further selection. Use each articulation’s handle to drag it to the correct staff line. As noted previously, per the settings setup for the template, the string markers will “snap” to the staff lines. Multiple articulations can be selected and moved at once.

Many notes can be selected to apply an articulation; the entire document can be selected and string markers applied to all notes at once. Since the articulation is placed arbitrarily near the note, this can make it difficult to go back and check that the string markers have all been moved to the correct line. It may be simpler to work on single measures or specific phrases at a time.


The example with correct note shapes and string markers.


Fret Numbers

The Lyrics tool is used for the fret numbers.
- Select the Lyrics tool from the tool palette.
- Click on the first note in the top staff. A text entry cursor will blink below the staff. The height of the text doesn’t matter at this point.
- Type in the fret number that corresponds to the note.
- Press the spacebar to move to the next note and continue to enter the fret numbers for each note.
- When you’ve competed the section you’re working on, press “Return” or Enter”.

Repeat this process for all the melody and bass notes.


Adjusting the Text Height
The height of the text can be adjusted using the triangles in the box on the left.


The left-most triangle sets the height for all lyric text throughout the document. You can either use this to set a baseline or simply leave it alone and set the melody and bass staves individually.

The second triangle sets the height of the lyric text for the selected staff throughout the document. To set the height of the fret numbers, click in each staff and use the second triangle to change the height. Fret numbers should be above the melody notes and below the bass notes.

The third triangle can be used to set the height of the text for that system only, without affecting the rest of the document. Again, this is specific to the selected staff.


The complete example with note shapes, string markers and fret numbers.


Chords

When notating chords, there are some specific aspects to keep in mind. The fret numbers for all the notes in the chord should be placed above (melody) or below (bass) the chord. The numbers are separated using a period. The fret numbers are read left to right, corresponding to the string markers going top to bottom. The staff lines provide a visual representation of the fretboard; the lines, top to bottom, represent strings 1-10. String markers should be placed so that they show the shape of the chord (how it is physically played). Note that in the bass, the left to right fret numbers and top to bottom string markers will correlate to the notes in order starting from the bottom.


The colors show which fret numbers and string markers apply to each note.


Here's an example of an A Major triad played in the melody, note how the string markers depict the shape of the chord.

A Major triad played in the melody. The picture is taken using a 12-string Stick, the staff lines represent the inner five strings.

A Major triad played in the melody. The picture is taken using a 12-string Stick, the staff lines represent the inner five strings.


Additional Tips

All of the aspects that are assigned to the note (the note shape, the fret number, and the string marker) stay with the note if copied and pasted, so it may be quicker to work on sections and copy and paste any repeating measures or phrases.

When preparing an arrangement for a 12-string Chapman Stick, the staff lines represent the inner five strings of the melody and bass side. Add the string pitch for each outside string at the start of the first system above the melody and below the bass staff. String markers for the outside strings are placed at the location of the first ledger line, again above or below the staff for melody and bass respectively.

When working on chords, dragging across the notes will only create one string marker, in this case it’s generally simpler to assign the string markers individually.

The “StaffTab” system name added to the template is associated with the first measure. If the measure is copied, that text will also be copied. Use the Smart Shape Tool to select it and delete any copies. If the first measure is deleted, the text will also be deleted. It can be added back using the method shown in Part 1.

Any additional adjustments made while working on a specific document (Lyric heights or Metatool assignments) can be saved as a template. Delete any notes and choose the “Save As” command to create a new blank file to use as a template.

Many thanks to Greg Howard for all of his assistance with answering questions about StaffTab and about setting up StaffTab in Finale.

StaffTab Tutorial Part 1: Setting Up A Finale Template

StaffTab Background

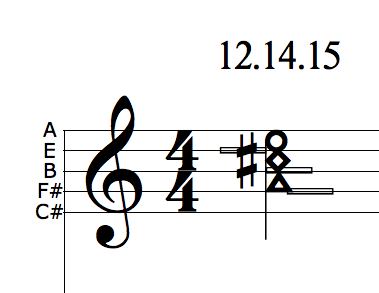
StaffTab™ is a method of notation developed by Greg Howard and Emmett Chapman that incorporates elements of standard notation and tablature to provide Chapman Stick players with comprehensive written notation. This system uses a grand staff, similar to piano music, and adds further information to aid in fretboard navigation as well as finger choice and placement. StaffTab is notated an octave higher than actual pitch and re-uses the staff lines as a visual guide for strings. The five lines of the treble and bass clef denote the five strings of the melody and bass sides respectively. For each note, a marker is placed on a staff line to show which string that note is played on. Fret numbers are listed above or below each note and the notehead shape denotes which finger to use.

Further information is available on Greg Howard's website. The video provided on that page has a clear description of all the elements of StaffTab.

StaffTab is a trademark of Greg Howard and Emmett Chapman.

About This Tutorial

This tutorial describes how to setup a document in Finale to use as a template for StaffTab arrangements. The information provided here is specific to Finale 2014 on the Mac platform, but the info should hopefully provide enough resources to set this up on other platforms or notation software. Part one of the tutorial shows the full setup, leading to a template that can be re-used. Part two will provide the information on how to use the template to create StaffTab works. A blank template will be provided with the second tutorial, although it’s strongly recommended to at least read through the setup section, as this will provide background on any potential customization options. This tutorial assumes a standard Finale 2014 Mac installation has already been completed.

Installing the Font

The custom Stafftab font must be installed in order to have the correct notehead shapes. This font can be found on this web page. Scroll down and download the StaffTab font conversion file. Extract the archive once it’s downloaded and move all the font files to the main font folder: Macintosh HD (top level of hard drive) > Library > Fonts.

After the font files are installed, the Finale MacSymbolFonts.txt file must be updated to include the font in the list. This file is in the Finale configuration folder: User > Library > Application Support > MakeMusic > Finale 2014 > Configuration Files. Open the MacSymbolFonts.txt file, add “Stafftab” to the list of fonts, then save and close the file.

Creating the Template File

Open Finale and start by creating a new file (Command+N).
- Click “SETUP WIZARD” in the dialog box.
- Select an Ensemble and Document Style: Any style can be selected, but it's simplest to stick with either the basic Engraved or Handwritten styles.
- Select Instrument(s): Add a Blank Staff > Grand Staff.
- Score Information: Enter any specific desired info for Title, Composer, etc.
- Score Settings: leave this at the default settings (unless a specific key and time signature is desired).
- Click “Finish”.

The preliminary document is now set up. Save this and keep saving the document as the tutorial proceeds.

Setting the Document Options

Some of the necessary setup is in the Document Options. From the Document menu, select Document Options (Command+Option+A). There are a few settings to change.

Fonts
In order to be able to select the correct noteheads and the correct symbol for the string marker, the Noteheads and Articulations fonts must be set to the Stafftab font.

- Select Fonts.
The menu for Notation defaults to Noteheads.
- Click “Set Font…”.
- In the Font dialog, select “Stafftab” and click “OK”.

- Back to the Notation menu, select Articulation from the menu and also set this to Stafftab.
- Click “OK”.

The other menus can be used to set default fonts for other items, if desired.

Lyrics
For StaffTab, the Lyrics tool is used for fret numbers. The default behavior for lyrics is to extend a line across any notes that don’t have specific lyrics. This is unnecessary, so it's simpler to disable this behavior.

- Select “Lyrics” and click on the “Word Extensions…” button.
- Uncheck the “Use Smart Word Extensions".
- Click OK.


Note Stems
Because StaffTab uses custom notehead shapes, the point where the stems connect to each notehead needs to be set. There are eight notehead shapes to set; four solid and four hollow shapes (one each for each finger). In order to set the stems, this process needs to be repeated for each notehead shape.

- Select “Stems”.
- Click on the “Stem Connections…” button.
- Click "Create...".


The Stem Connection Editor shows a default notehead and both an upward and downward stem.
- Click the “Set Font…” button.
- Select Stafftab.
- Click OK.


- Click “Select…”.


The Symbol Selection dialog provides a way to select the notehead shape to setup the custom stem positions. The first example is the solid round notehead. This resides in symbol position 207, which can be selected by scrolling to it and clicking it. This symbol can also be selected using the character for  the symbol, Option+Q in this case.

- Click “Select” to close this dialog box.


- Back to the Stem Connection Editor, it now shows the solid round notehead with the stems noticeably detached. The stems can be moved with the mouse or by typing in specific adjustments. Set this so that the stems meet the notehead at its left or right edge and so that they are also aligned vertically to notehead.

Round note shape before aligning stems.

Round note shape with stems aligned.


- Click “OK” once the stems are aligned.
 

This process (creating the stem connection, setting the font, choosing the symbol, through aligning the stem) needs to be repeated for each notehead. Simply create a new stem connection for each notehead.

The specific symbols to use are as follows:
207 = (Option+Q) = solid circle
226 = (Shift+Option+0) = solid diamond
209 = (Shift+Option+-) = solid triangle
208 = (Option+-) = solid square
250 = (Option+H) = hollow circle
225 = (Shift+Option+9) = hollow diamond
177 = (Shift+Option+=) = hollow triangle
173 = (Option+=) = hollow square

- Once all eight notehead stem connections are setup, click “Done”.

- Click “OK” in the main Document Options window when all settings have been completed.
 

String Markers

To make string marker placement simpler when doing the actual arrangement, it's best to setup the specific symbol and positioning elements within the template.

The string markers use an articulation. It’s easier to set this up with some notes in the staff, so add some notes to work with before setting this up. The Articulation tool is used for the string markers, select this from the main tool palette.


- Click on a notehead to bring up the “Articulation Selection” dialog.


- Click “Create…” to bring up the “Articulation Designer” dialog.


Under Symbols:
- Click the “Set Font…” button and select the Stafftab font. (This should be the default if it was setup in the Document Options.)

- Click “Main…”.
- Type a hyphen or find symbol 45.
- Click “Select”.

Under Positioning:
- Check “Avoid Staff Lines”. This causes the handle to avoid the staff lines, but the string marker will line up with the staff line.
- Check “Center Horizontally".
- Set the "Default Vertical Position" to 0.
- Click “Handle Positioning…”.
- In the “Handle Positioning” dialog, set the Main Symbol horizontal offset to -.055.
- Click “OK” to close the dialog.

- Click “OK” in the Articulation Designer dialog to close the it.

Back to the Articulation Selection dialog
- Click “Select”.

These settings will generally place the string marker on the staff line closest to the notehead, horizontally centered to the notehead.

The Page and System

In order to denote that this grand staff is for Chapman Stick, rather than piano, some changes need to be made to the staff system. There are a few steps to this. The staff bracket will be removed and a “StaffTab” text will be added. Since the string markers in StaffTab use the staff lines to represent the strings, the note names will be added to each staff line to denote which pitch each string is tuned to.

Staff Bracket
Simply removing the bracket will cause the barlines to only cross each individual staff, not the entire staff system, so it’s best to remove the bracket using the Staff tool menu.

To remove the bracket:

- Select the Staff tool.


- Select the bracket.


- From the Staff menu, select “Groups and Brackets”.
- Select “Edit…”.
- Change the Bracket Options to “None”.
- Click “OK” to close the dialog.


String Pitches
Use the Text tool to add pitch names to the staff lines. A simple way to implement this is to create a text block for each letter and type the letter. Once all the text blocks are created, select them all by clicking and dragging across them. Use the main “Text” menu to set the font and font size.

The easiest way to know which pitches are used in any tuning is to look at the Stick Enterprises tunings page.  Select the tuning used for the arrangement (on the right). The notes listed on the individual 10-string tuning pages is what each line of the staff represents (in order).

StaffTab System Name
To complete the system setup, we need to denote that the staff system is for StaffTab. There is no default method to set text so it’s vertical, but the Smart Shape tool can be used to do this. The method is described in detail in this video tutorial.

- Option+Click the Custom Line tool from the SmartShape tool palette to open the Smart Line Selection dialog.

- Select the Smart Shape tool.

- Click “Create…” to start a new custom line.


In the Smart Line Designer dialog, leave the Style as Solid and change the Thickness to 0. This will create an invisible line.

- Under “Text”, click “Edit…” next to “Center Full:”.
- In the Edit Text box, type “StaffTab”.
- Select/highlight that text and use the main Text menu to set the font and font size. This sets up the text to be attached to the invisible line.

- Click “OK” to close the “Edit Text” dialog.
- Click “OK” to close the “Smart Line Designer” dialog.

- Back to the “Smart Line Selection” dialog, make sure the new StaffTab “line” is selected and click “Select”.

- Back to the staff, with the Custom Line tool still selected, hold Shift, then double-click in the space to the left of the first staff system and keep the mouse button down.
- While holding the button, move the cursor up until the word “StaffTab” is completely visible, then release the mouse. The word may disappear, but its handle is still visible.
- Click on its handle to select it and move it to its proper location to the left of the first staff system, between the two staves.

The full staff is now correctly identified as StaffTab with the string pitches.

That's it!

The template is now setup properly for StaffTab. Any test notes, string markers, and fret markings can be deleted and the file saved. It’s a good idea to lock this file and set it up in the templates folder so it’s easy to re-use. The next tutorial will cover how to use these various methods to notate a StaffTab arrangement.

Many thanks to Greg Howard for all of his assistance with answering questions about StaffTab and about setting up StaffTab in Finale.

[Edit 5/17/15 - Changed the Note Stems section so that new stem connections are created for the template, rather than altering existing stem connections.]